Using a shower chair safely after knee or hip replacement surgery is essential for preventing falls and protecting your healing joint. Here’s a comprehensive guide to help you navigate this important aspect of your recovery.
Why is a shower chair a must-have tool after surgery
Bathrooms are often the place in the home where accidents are most likely to occur. For patients who have just undergone surgery, reducing the risk of falls is a top priority. Your sense of balance has not yet fully recovered after surgery, and your reaction speed may also slow down.
Imagine this scene: when you close your eyes to wash off the foam on your head, the slippery tiles under your feet, along with the steaming steam, may instantly make you lose your balance.
This dizziness is extremely dangerous if you are standing at the moment; But if you are already sitting steadily in the shower chair, the risk of falling due to the slippery and obstructed view is averted.
In addition, using a shower chair can help you strictly adhere to posture limits and avoid excessive bending. Doctors often stress in particular that patients who have undergone hip replacement should avoid bending their hips more than 90 degrees (that is, their knees should not be higher than their hips when sitting).
When taking a standing shower, if you try to clean your calf or foot, subconscious bending or lifting of your leg can easily violate this taboo and even strain unhealed tissue.
Sitting in a height-adjustable shower chair, your buttocks will naturally remain in a safe position, which not only meets the post-surgery recovery requirements but also allows you to easily complete the cleaning with a long-handled sponge without the risk of standing on one leg to reach the lower parts of your body.
Finally, do not underestimate the physical exertion of taking a bath. The body is mobilizing all its resources to repair itself during the healing process, which is exhausting in itself. While hot baths are comfortable, prolonged standing and the effect of steam can easily lead to “bathroom fatigue” and even dizziness in postoperative patients.
Ageally encountered such a case: Ronald Patrick Harris from the UK insisted on standing to take a bath in an attempt to “prove that he was recovering well”, but ended up exhausted and had no energy left for the day’s rehabilitation training. Using a shower chair can help you conserve your precious energy, allowing you to focus on more important physical therapy rather than just forcing yourself to stand upright while bathing.
Create a safe bathroom environment with essential equipment
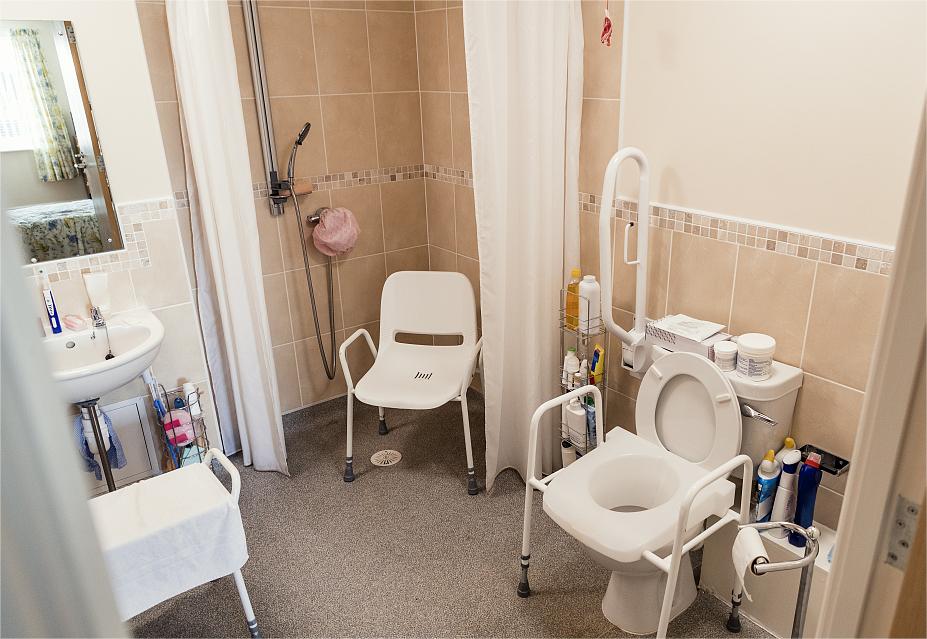
Before you head to the hospital for surgery, be sure to re-examine your bathroom with a “troubleshooting” perspective.
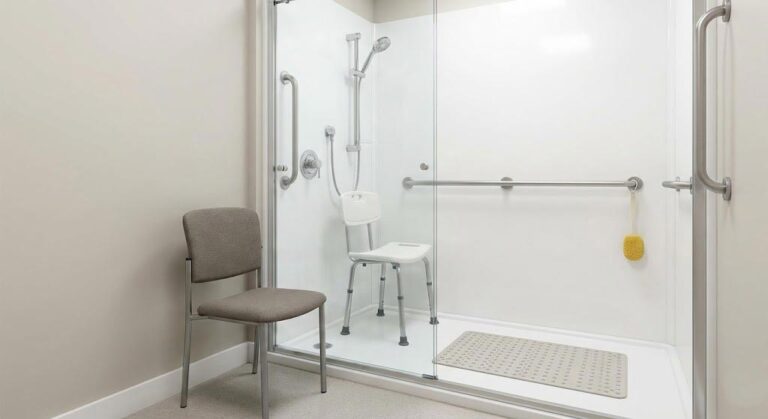
Environmental improvement is the first step: First, please remove all the scatter rugs in the bathroom that are prone to tripping over walking AIDS until you fully recover. If your home has a glass shower door with a slide rail, it is recommended to temporarily remove and replace it with a shower curtain if conditions permit. Glass door tracks are usually high and difficult to cross, and the door opening is narrow, which can make you feel cramped when using a shower chair or bench to get in and out, while a shower curtain provides the widest accessible passage. Also, don’t forget to check for adequate lighting and adjust shampoo, soap, and towels in advance to a height within your reach when you’re sitting to avoid slipping while taking a bath as you have to turn around or stand up to get something.
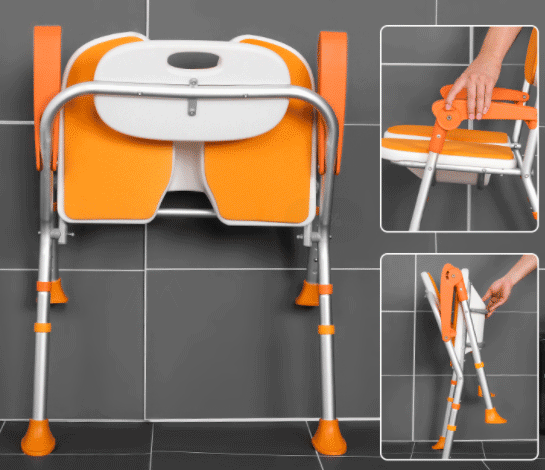
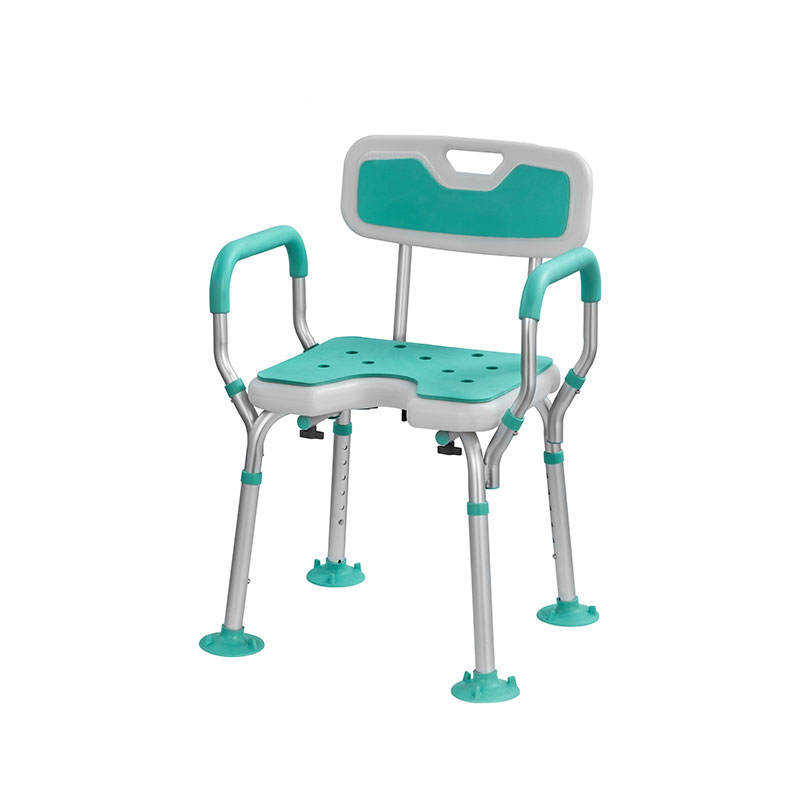
Next comes the preparation of the core gear. What you’ll need most is a Shower Chair or Tub Transfer Bench with anti-slip footpads and sturdy armrests.
Handrails are very important because they are the key for you to leverage when you sit down and stand up. Apart from the chair, a handheld showerhead is almost a must-have – when you’re sitting, a showerhead fixed high up in the wall can be hard to flush in place, and a handheld showerhead gives you easy control over the direction of the water flow.
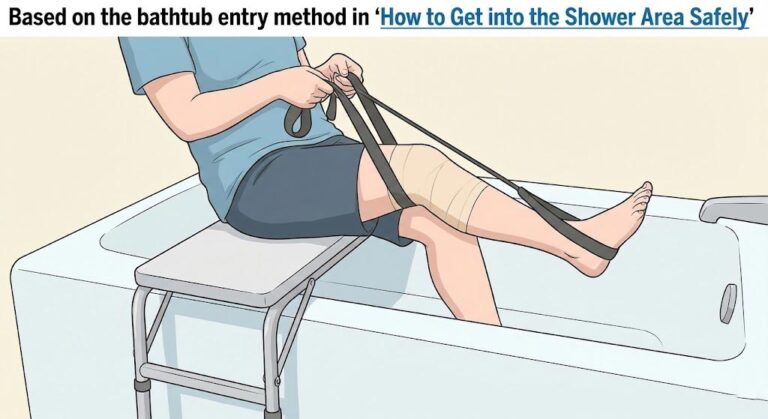
Be sure to have a long-handled sponge brush ready to reduce the “bending over” scene for cleaning your calves and feet. Also, many people overlook an unremarkable but highly useful gadget – the Leg Lifter, a hard webbing that helps you lift your weak leg as easily as you would lift something, assisting in getting in and out of the bathtub.
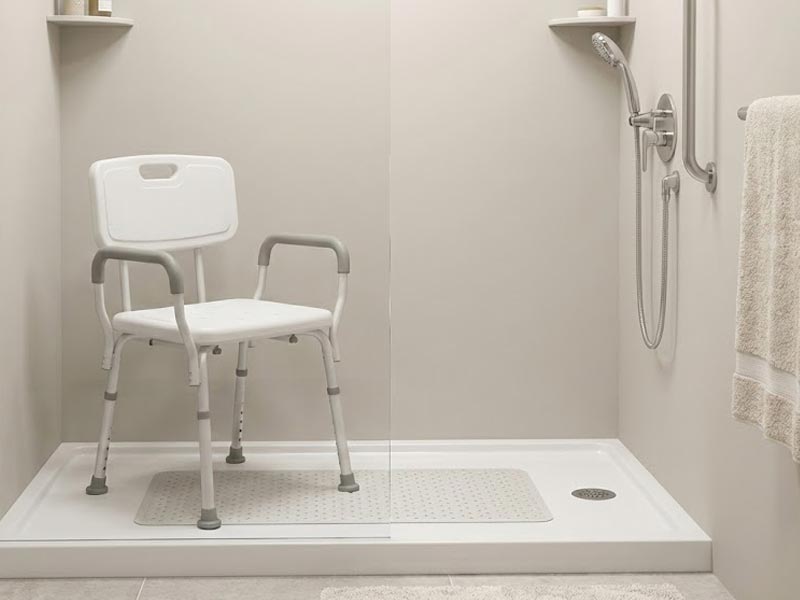
Finally, safety is not just within the shower room. Lay high-quality anti-slip MATS both inside and outside the bathtub or shower, and install Grab Bars on the walls to provide additional support points.
One more often overlooked detail: Place a sturdy chair outside the bathroom door to dry your body. Many falls occur on the way back to the bedroom to get dressed after taking a bath. The safest thing to do is: after taking a bath, move to this dry chair and sit down, dry your body and get dressed calmly, and then leave the bathroom when you have regained your strength.
Practical Guide: How to Get into the Shower Area Safely
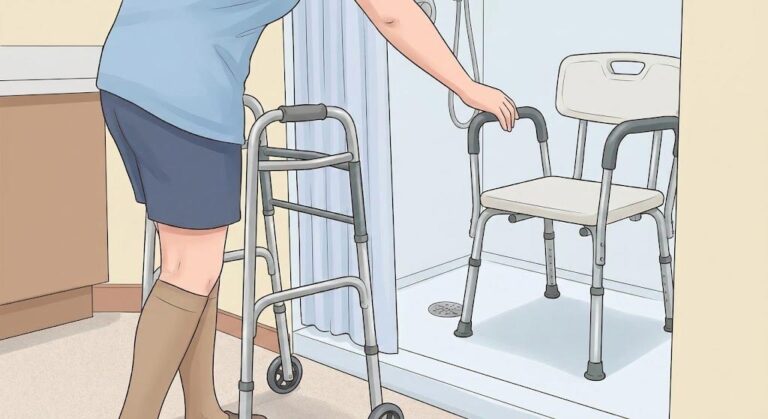
If you are using a walk-in Shower, the core rule for entering is “reversing into parking”. Never Walk straight into the shower room and then try to turn around. Use a walker first to step back to the edge of the shower room door with your back to the entrance. When you are ready, hold the walker steady with one hand and reach back with the other hand to grab the back of the shower chair as a fulcrum. Before sitting down, be sure to slightly straighten the leg that has undergone surgery forward – this movement can prevent your knee from bending too much. When you are slowly seated in the chair, lift your legs one by one over the shower room threshold (water barrier), and then slowly turn your body in the chair until you face the faucet.
In cases where the home is a Bathtub (Bathtub), the logic is completely different. Never try to stand over the bathtub wall. You will need to use a Transfer Bench that extends outside the bathtub. First, step back with your back to the bathtub until your calf touches the leg of the stool or the edge of the seat that is exposed outside the bathtub. Also keep the surgical leg extended forward and sit down slowly. You are outside the bathtub at this point, which is the safest position.
Here’s a key tip, especially for hip replacement patients, when moving from outside the bathtub to inside: Keep your upper body slightly tilted back when lifting your leg. This backward-leaning movement ensures that your hip joint Angle remains above 90 degrees all the time, preventing the risk of dislocation. Maintain this slightly tilted position and use the Leg Lifter we mentioned in the equipment list or both hands to assist in lifting the surgical leg over the high edge of the bathtub before lifting the other leg. Once both legs are in the bathtub area, grab the handrails and slide your butt towards the inside of the bathtub, and finally adjust your sitting position to face the showerhead.
Special tips and wound care for hip replacement patients
For friends who have undergone hip replacement, sitting in a shower chair doesn’t mean you can completely let your guard down. There is only one core principle: Do not bend or twist excessively. Throughout the shower, keep the leg on the surgical side slightly straight forward and never cross your legs or turn around suddenly.
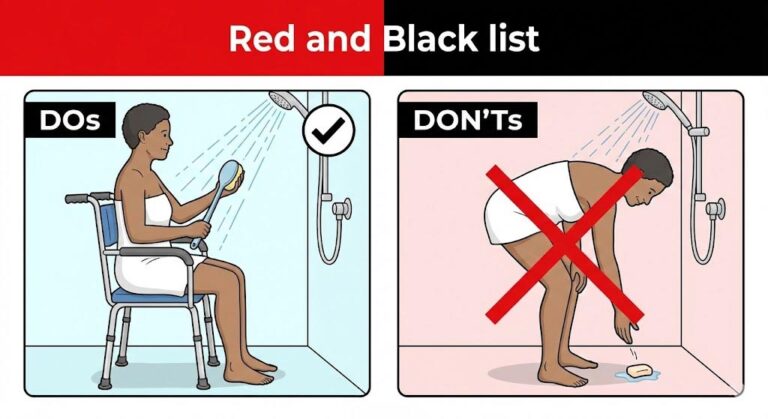
When you need to wash your calves or toes, do not subconsciously bend over to reach them. That is one of the biggest “forbidden movements” after surgery and can easily cause dislocation of the joint. At this point, the long-handled sponge brush is your “arm extension”, allowing you to complete a full-body clean while keeping your back straight. At the same time, always remind yourself not to lean forward to reach for your bath products, and if the soap accidentally slips to the ground, do not try to bend over to pick it up. Safety is always more important than a bar of soap.
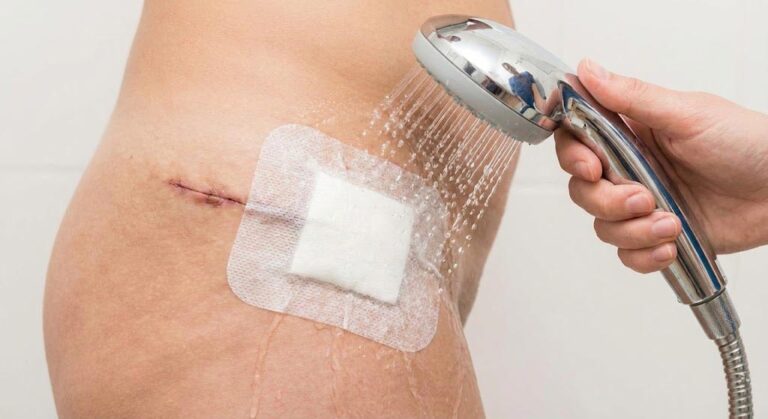
When it comes to wound care, surgeons often have strict “waterproof orders”. Be sure to cover your incision with a waterproof dressing if there are still sutures at the incision site, or if the wound has not fully scabbed and healed (many patients find that strong home cling film, combined with medical tape, works well to prevent water).
When taking a shower, while running water is usually allowed to pass through the wound briefly, soaking is absolutely forbidden. After the bath, handle the wound as gently as you would a baby: Pat dry the surrounding area with a clean towel, and avoid rubbing back and forth to prevent irritating the fragile tissue that is healing or accidentally knocking off the protective scab.
Safely out of the shower area: Reverse operations and anti-sticking techniques
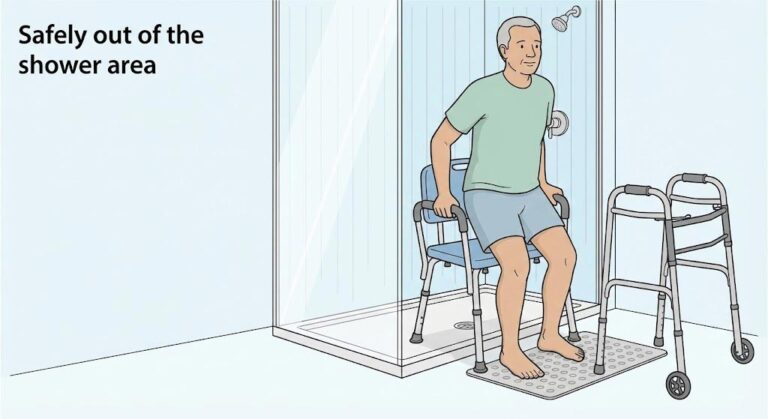
Leaving the shower area is essentially a “rewind” of the entry steps, but there is a often overlooked physical problem here: moist skin can easily stick to the plastic chair surface, making it difficult for you to move. So, try to sit in the chair and dry your body before getting up.
Here’s a practical tip often recommended by rehabilitation therapists: If you find your butt stuck to the chair and hard to move, try stuffing a dry towel under your butt. This fabric can instantly reduce friction, allowing you to slide on the bench as if on flat ground and greatly reducing the violent twisting that would cause you to move your body.
When you’re ready, start doing the reverse. If you are using a bathtub transfer stool, first use that dry towel to slide towards the outside of the bathtub while keeping your upper body slightly tilted (to protect your hip joints), and use leg straps to “move” your legs out of the bathtub wall one by one. If you are in a walk-in shower, turn your body slowly towards the door first and then move your legs out of the water barrier.
The most crucial step is standing up. When both feet are firmly on the anti-slip mat on the bathroom floor, never reach out directly to pull the walker in front of you for help – the walker may tip over. The correct way to apply force is to first push yourself up by holding onto the armrests of the shower chair with both hands, and then transfer your hands to the walker when your body is fully upright and stable. Slow down and steady, this is the secret to preventing slipping at the last minute.
Extra Shower Chair Safety Tips And Purchase Recommendations
When choosing a shower chair, never make do with an ordinary plastic garden chair just to save money. A qualified rehabilitation shower chair must have sturdy armrests because, as we mentioned earlier, this is your only point of support when you get up.
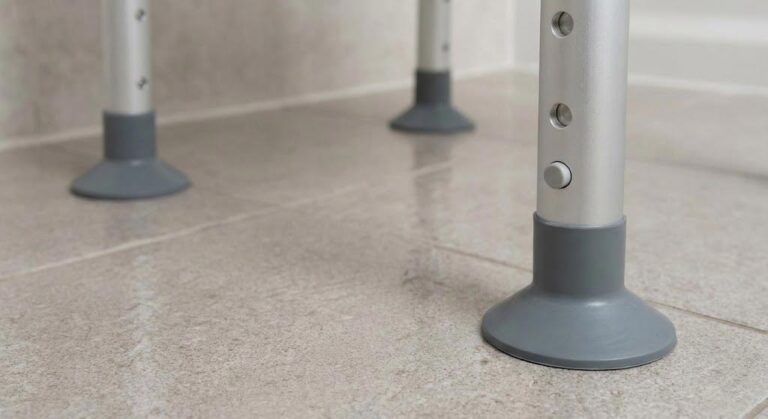
At the same time, a height-adjustable feature is essential, which ensures that your feet touch the ground smoothly rather than wobbling in the air. Be sure to check if the chair legs have wide anti-slip rubber pads. If you have sensitive skin or are concerned about pressure sores, choosing a model with soft pads will make the entire bath process much more comfortable. After all, hard plastic boards are not comfortable to sit on for a long time.
When it comes to specific anti-drop strategies, even if you feel good about your condition, follow the “First shower must be accompanied” principle, that is, when you take your first shower after surgery, make sure to have a family member or caregiver by your side to boost your confidence. Before sitting down each time, form a good habit: gently shake the chair with your hand to make sure all four feet are firmly attached and there is no shaking. Mentally, completely avoid being in a rush. Slow movement is not clumsiness but the best protection for your joints. Also, always make sure that the anti-slip mat on the ground is flat and securely attached to the ground, so that it does not curl up and become a risk of tripping you.
Finally, if your home is a very narrow walk-in shower room and there is no room for a chair, and your balance has recovered quite well, then a standing shower is also an option, but it must meet strict safety conditions: there must be load-bearing handrails on the walls for you to grasp at any time, there must be anti-slip MATS under your feet, and the walker must be within easy reach just in case. Even so, it is strongly recommended that someone be on standby outside the door in case of sudden dizziness or exhaustion.
When is it okay to say goodbye to the shower chair?
Many patients are eager to know when they can resume “normal bathing”. Generally, this depends on your specific recovery progress rather than simply looking at the calendar. Typically, you can consider a transition when you feel that your leg strength and balance have significantly recovered and that your knee or hip joint can easily reach a safe range. Most patients start trying to get off the shower chair around 4 to 6 weeks after surgery, but this is definitely not a race.
The most important criteria before making a change are: you must have explicit permission from your surgeon or physical therapist and feel confident and stable when standing yourself. If you still have the slightest hesitation or wobbling, continue to use the chair. Safety is always better than speed.
Final important reminder: Post-op Do’s and Don’ts after surgery
To ensure your recovery journey is safe, we have compiled this list of core behaviors for you. Go through it quickly in your mind before entering the bathroom each time:
Must-do (DOs):
- Be prepared: Make sure to install and debug the shower chair, armrests, etc. before the operation. Don’t wait until the day you go home to be in a rush.
- Rehearsal practice: Before taking off your clothes and when your body is dry, conduct several “dry rehearsals” to familiarize yourself with every detail of the transfer movement.
- Keep in touch: It’s best to have a mobile phone (waterproof) in the bathroom so that you can call for help immediately in case of an emergency.
- Use external assistance: Use walking AIDS and bathing AIDS strictly as directed by your doctor and don’t overestimate your physical strength.
DON'Ts:
- Blind crossing: Never try to stand on one leg and cross the high bathtub wall if you haven’t moved the bench.
- Sit too low: Avoid sitting on any low surface that makes your knees higher than your hips (such as a regular low stool or toilet), which is extremely dangerous for your hip joints.
- Twist your body: Whenever you turn to pick up something, turn your feet along with your body. Never fix your feet to twist your knees or waist.
Early withdrawal: Do not remove the shower chair on your own just because you “feel better” without your doctor’s permission.
Remember, recovering from joint replacement surgery takes patience. Using a shower chair properly can prevent complications and help you heal safely. Always consult with your healthcare team if you have specific concerns about your recovery process.